Complete Payment Links Guide
Complete Payment Links Guide
This document provides a comprehensive overview of how to configure and use Payment Links within DigiWedge, covering everything from setting up Payment Departments and Items to sending single or multi payment links. It also includes tips on notification settings, reporting, and best practices.
1. Introduction
Payment Links let you send members (or other payers) a secure URL to settle a fee online. DigiWedge supports:
- Single Payment Links for one-off charges.
- Multi Payment Links for uploading a CSV, generating numerous links in a single batch.
Integration Note: If you have a club management system (like Jonas) connected, processed payments can be automatically posted to the member’s account.
2. Payment Departments & Payment Items
Before sending out any payment links, you must configure:
- One or more Payment Departments
- One or more Payment Items tied to each department
2.1 Creating or Editing a Payment Department
- Go to Administrator → Account Admin → Payment Departments.
- Click New to create a new department or Edit to modify an existing one.
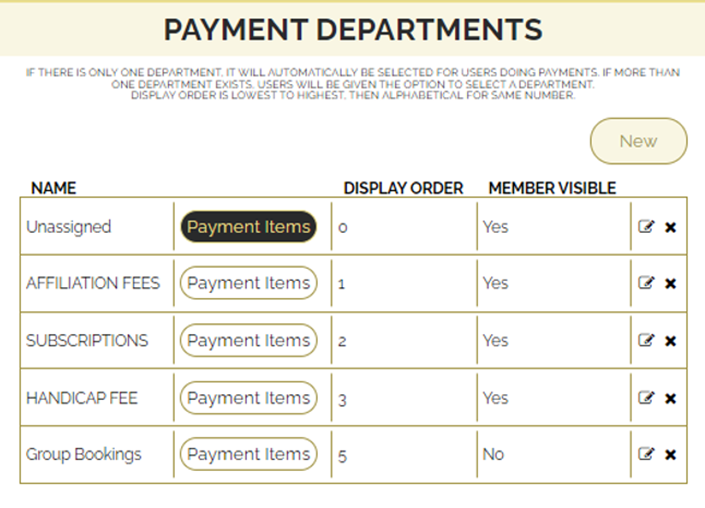
Fields:
- Name: e.g., “Subscriptions Department”
- Display Order: Dictates order in dropdown menus.
- Not Visible to Members: Hides the department from member-facing screens if selected.
2.2 Payment Items
Each Payment Department can have multiple Payment Items. For example, “Quarterly Subs,” “Green Fees,” etc.
- From the Payment Departments page, click the Payment Items button next to the department you want to modify.
- Click New to create a payment item or Edit to update an existing one.
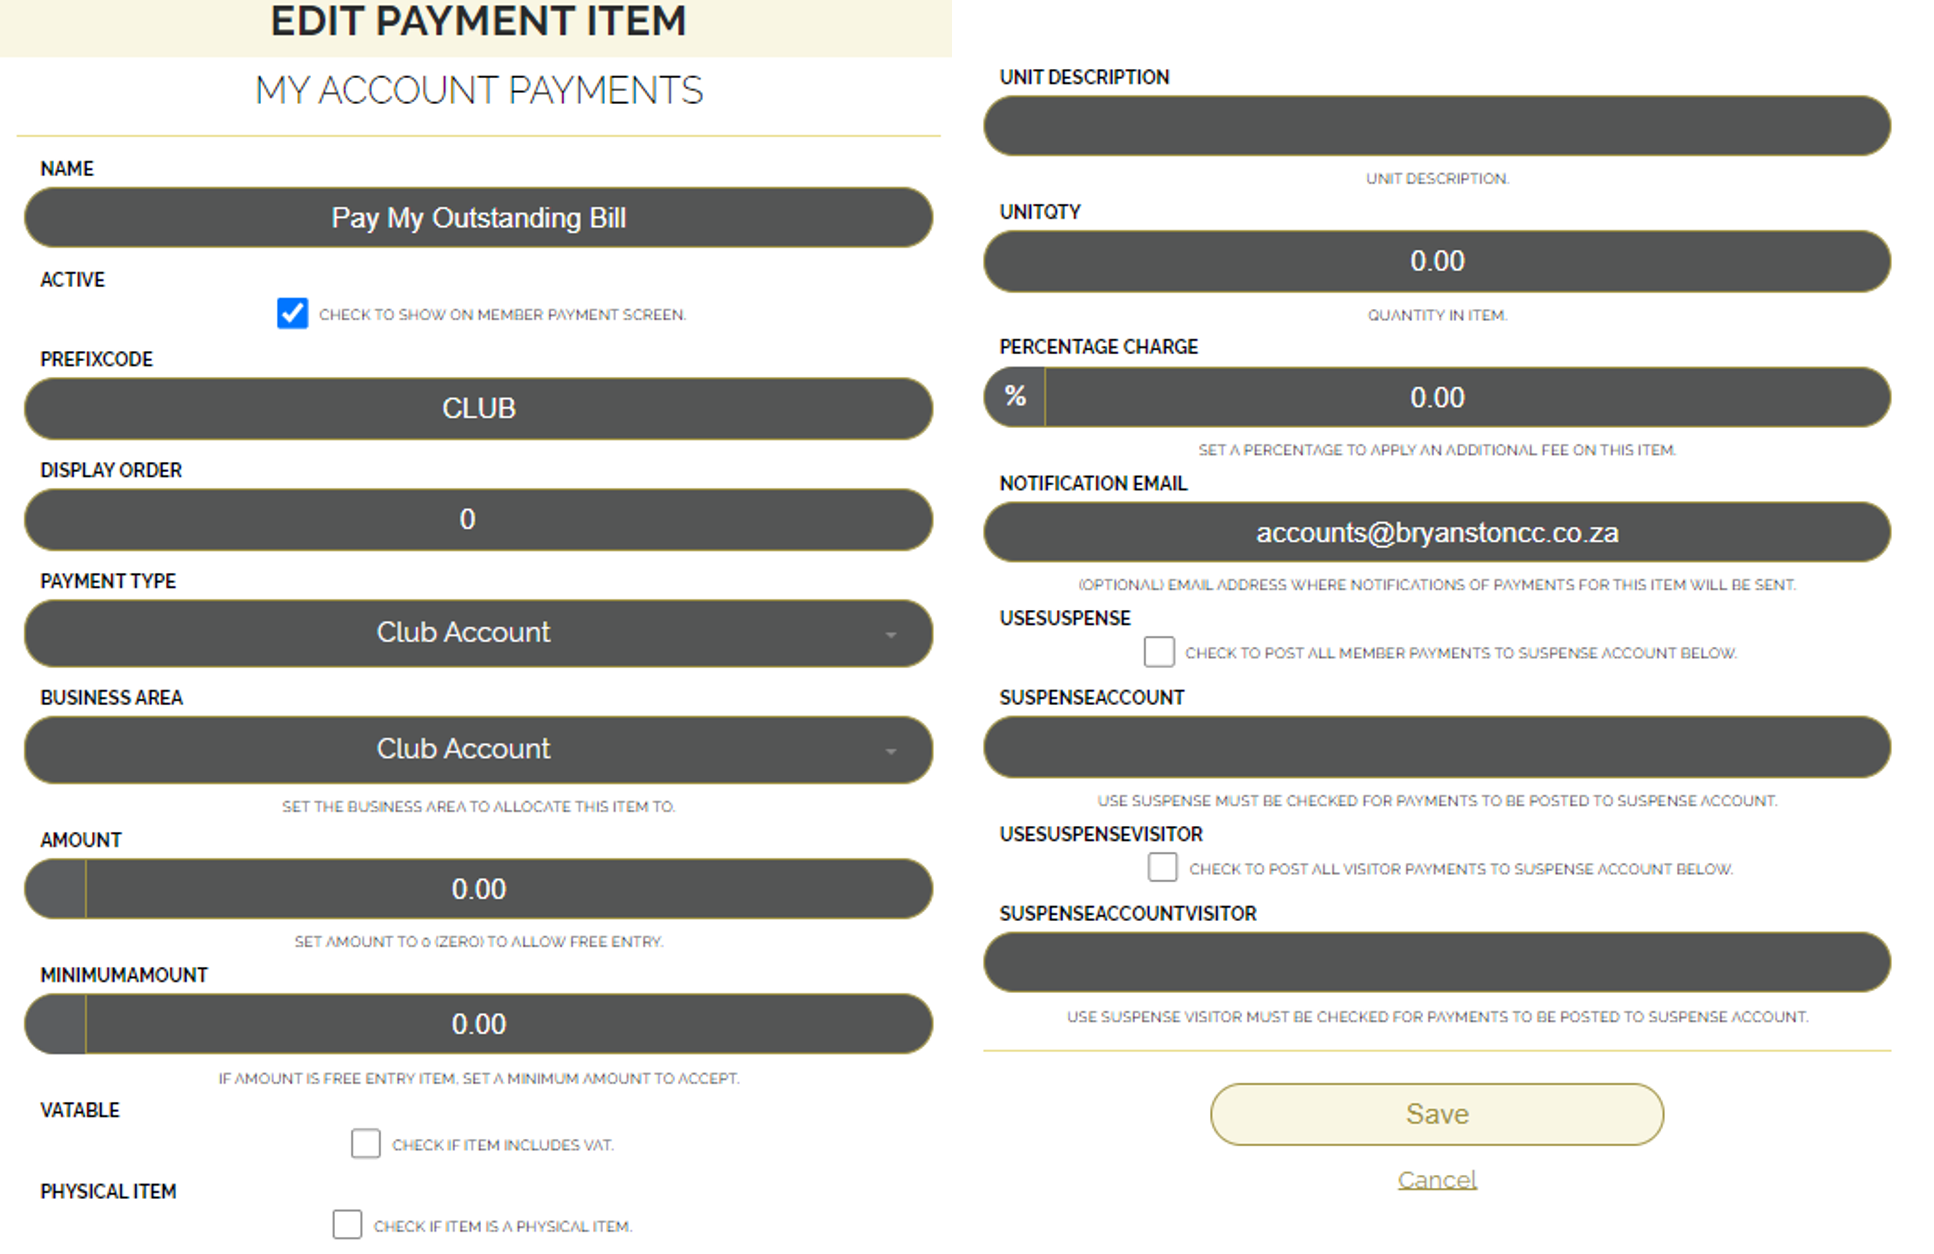
Key Fields:
- Name: e.g., “Quarterly Subscription.”
- Active: Makes the item visible to members.
- Amount:
- If set to a fixed amount, that’s the charge per transaction.
- Set to 0 for “free entry,” meaning the user or admin can type an amount.
- Notifications Email: (Optional) receives alerts whenever this particular item is purchased.
- UseSuspense: If checked, payments from this item can post into a suspense account.
If integrated with Jonas or another system, you can configure business areas, tax, etc., as needed.
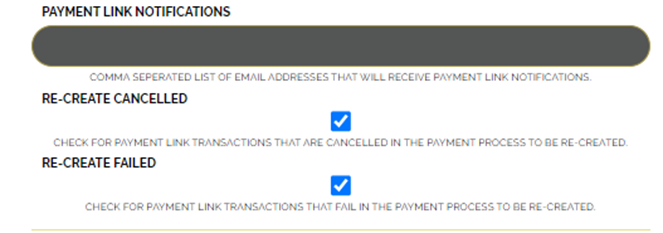
3. Reporting & Notifications
Under Administrator → Account Admin → Reporting & Notifications, you can set global notifications and behaviors:
- Payment Link Notification: An email address that receives copies of all outgoing payment links.
- Re-Create Cancelled: If a member/payer cancels the payment at the gateway, DigiWedge auto-generates and re-sends a new payment link so they can retry.
- Re-Create Failed: If a payment fails (e.g., invalid card), a fresh link is automatically created and emailed.
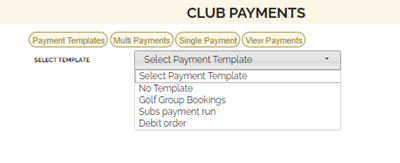
4. Accessing Club Payment Links
- Log in with an administrator account.
- Go to Administrator → Account Admin → Club Payment Links.
You’ll see a menu of options:
- Payment Templates
- Multi Payments
- Single Payment
- View Payment Links
5. Payment Templates
Payment Templates let you define reusable message text, discount/exclusion logic, and default department/billing item. When generating single or multi payment links, you can load these templates to save time.
- From the Club Payment Links page, select Payment Templates.
- Click New to create or select an existing template to edit.
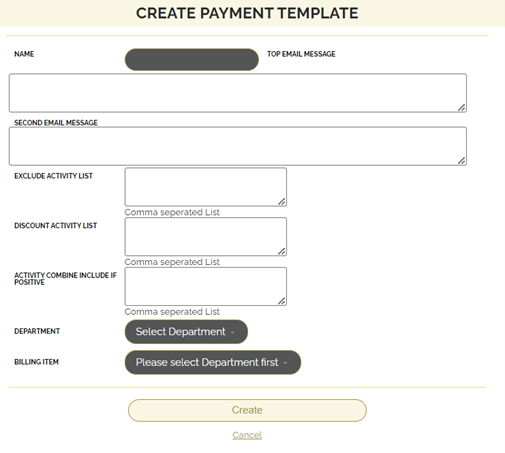
Template Fields:
- Name: e.g., “Club Subscriptions Template.”
- Top Email Message: Appears right under “Dear [Member Name].”
- Second Email Message: Appears above the “Make Payment” button.
- Exclude Activity: Comma-separated list of activities that should be skipped entirely.
- Discount Activity: Activities that should receive a discount.
- Activity Combine Include if Positive: Activities that should be summed. Only if that sum is > 0 do they appear in the final total.
- Department & Billing Item: Which department/item to use for posted payments.
6. Multi Payments
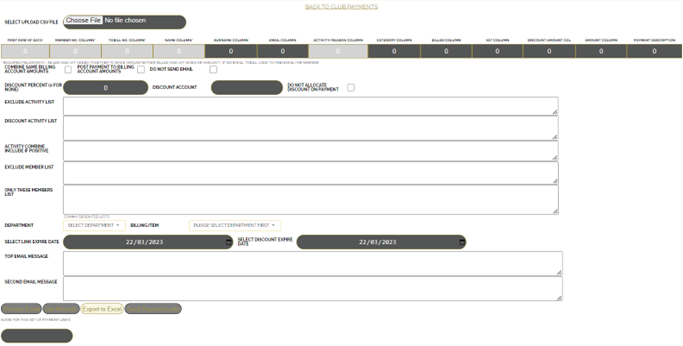
Multi Payments let you generate payment links for multiple members at once using a CSV file.
- Navigate to Club Payment Links → Multi Payments.
- Upload CSV File: This must be saved as
.csv(not.xlsx). - Match CSV Columns: Map each column in your file (e.g.,
Name,Member No,Amount) to the expected fields in the Multi Payments form. - Set Payment Options:
- Combine Same Billing Account if multiple lines belong to the same payer.
- Department & Billing Item: Which department/item to post these charges to.
- Link Expire Date: After this date, links become invalid.
- Discount Percent: Or fill in advanced discount fields if you want to apply or hide discounts.
- Email Messages: You can override the top and second email text or load them from a Payment Template.
- Get Records: Once columns are mapped, click Get Records to parse the CSV. A summary of entries and totals will appear.
- Preview Email: Optionally view how the final email looks.
- Name for this set of Payment Links: Helps with filtering on the “View Payment Links” page.
- Send Payment Links: Emails the link to each row in the CSV.
Example Workflow
- Go to Multi Payments.
- Choose File → Select your
.csv. - Match the Column Headers (e.g., Member No., Amount).
- Pick Department & Billing Item.
- Link Expiry Date → e.g., 2023-12-31.
- Optionally set up discount logic or exclude certain activities.
- Get Records → verify summary.
- Preview Email if desired.
- Send Payment Links → a secure link is emailed to each row’s recipient.
7. Single Payment Link
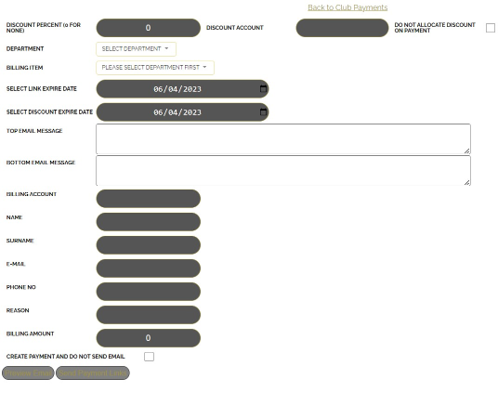
Use Single Payment Link for one-off or ad-hoc charges.
- Go to Club Payment Links → Single Payment.
- Department & Billing Item: The category of the payment.
- Link Expire Date: After this date, the link no longer works.
- Discount Account / Discount Percent: If you need to allow a discount, set these fields.
- Top Email Message & Bottom Email Message: Custom text for the email body. You can also load from a template.
- Billing Account (if integrated with Jonas).
- Recipient Info: Name, Surname, Email, Phone.
- Reason: e.g., “Green Fees,” “Subs,” or “Tournament Fee.”
- Billing Amount: The total (including VAT, if applicable).
- Preview Email to check.
- Send Payment Link to finalize and email the user.
8. View Payment Links
To manage, re-send, or edit existing links:
- Navigate to Administrator → Account Admin → View Payment Links.
- Filter by date range, link status, or “Name for This Set of Payment Links” if you used that field.
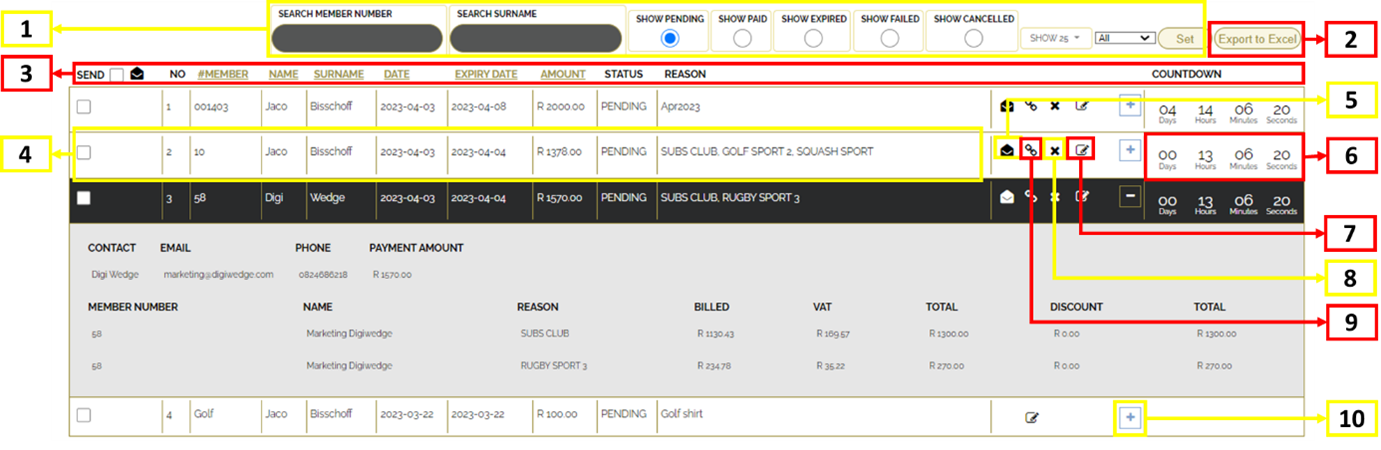
Actions
- Re-send: Emailed to the same address again.
- Countdown Timer: Shows how long until the link expires.
- Edit: Update details (email address, amount, etc.) and re-send to a new address.
- Cancel: Immediately invalidates the link.
- Copy Payment Link: Copy the link’s URL to your clipboard for manual sharing.
- Expand Transaction Tab: See more details about the transaction, including any discount or partial payments.
9. Best Practices
- Always configure Payment Departments & Payment Items first.
- Use Payment Templates to save time on frequently repeated messages or discount logic.
- Multi Payments is ideal for bulk charges, especially if you have a CSV from another system.
- Single Payment for ad-hoc, individual charges.
- View Payment Links to monitor statuses, re-send links, or cancel them if needed.
- Keep an eye on Reporting & Notifications to track email logs and handle re-creation of cancelled or failed gateway attempts.
Last updated: 2025-06-22